
The roof-to-wall transition is one of the most critical and vulnerable points in the building enclosure, where multiple systems and materials must come together to maintain continuity. As a leader in flashing solutions, York Flashings recognizes the need to address these critical conditions and has developed a series of details to provide practical solutions for complex roof-to-wall transitions.
All of these details feature York 304 SA stainless steel combined with UniverSeal US-100 Sealant to provide a durable, compatible solution that connects neighboring components and helps reduce the risk of failure at this critical transition.
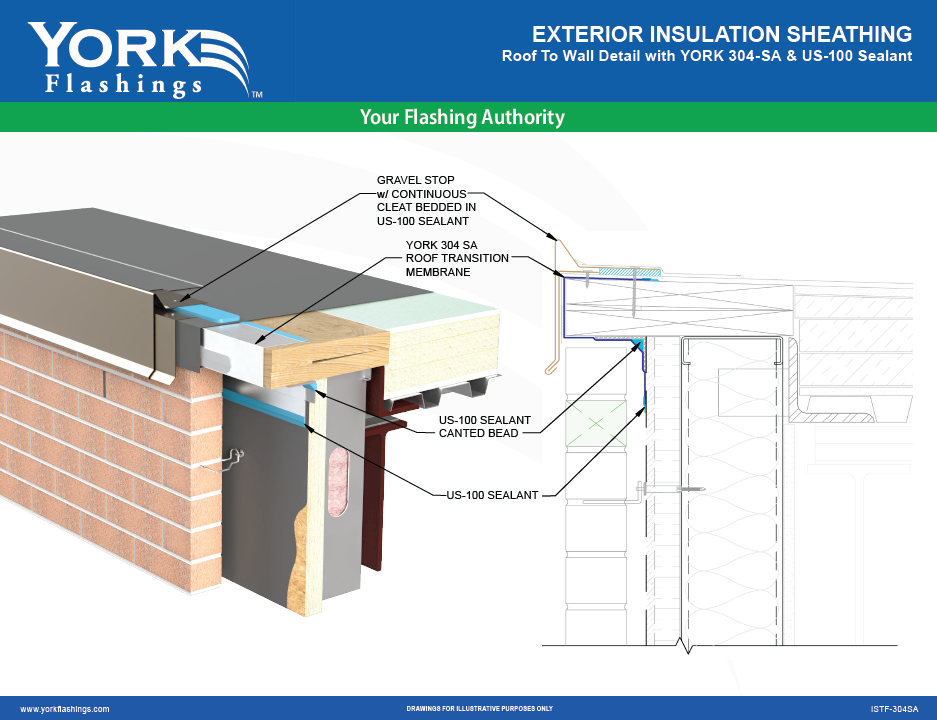
Exterior Insulation Sheathing


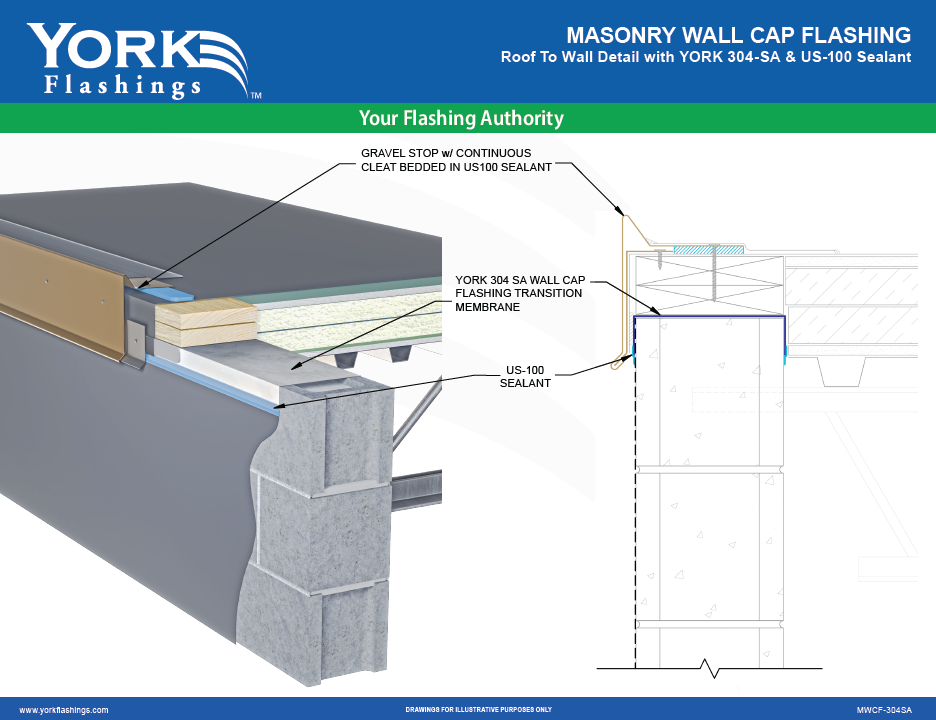
Masonry Wall Cap Flashing
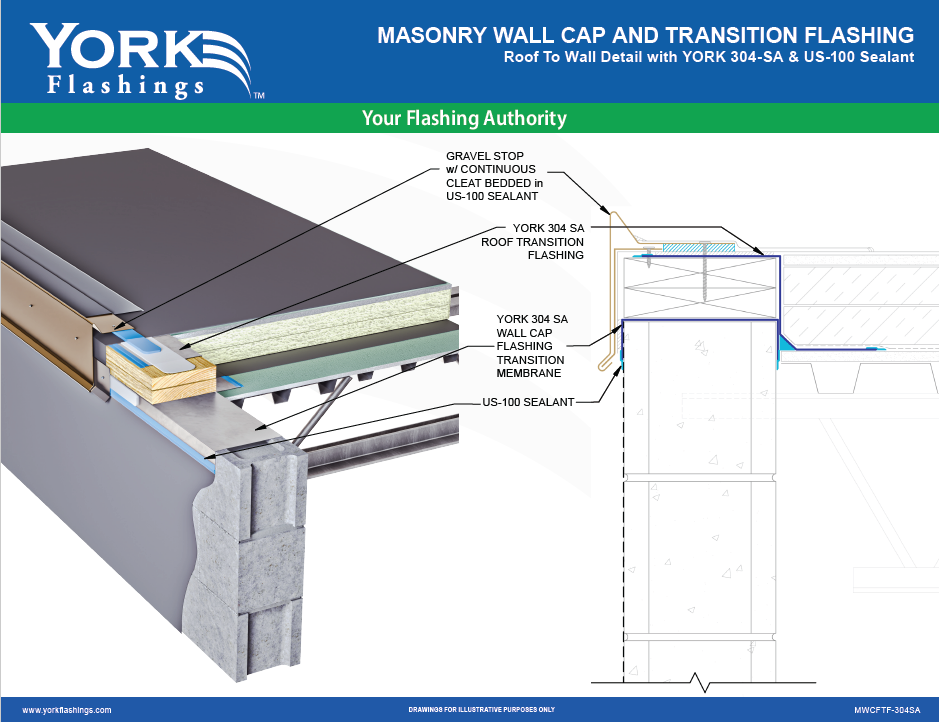
Masonry Wall Cap and Transition Flashing
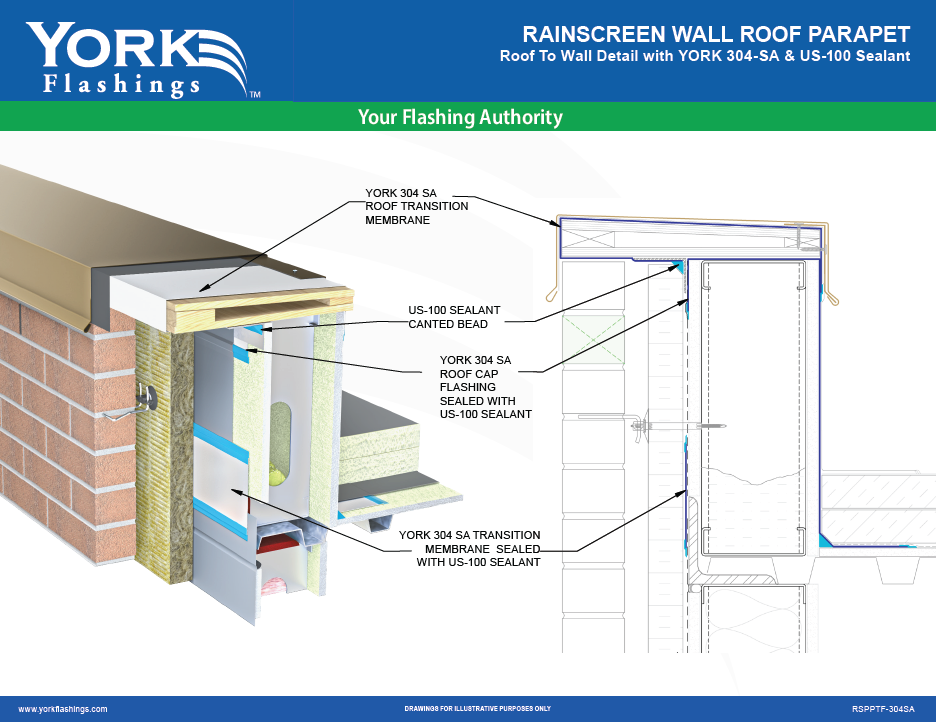
Rainscreen Wall Roof Parapet
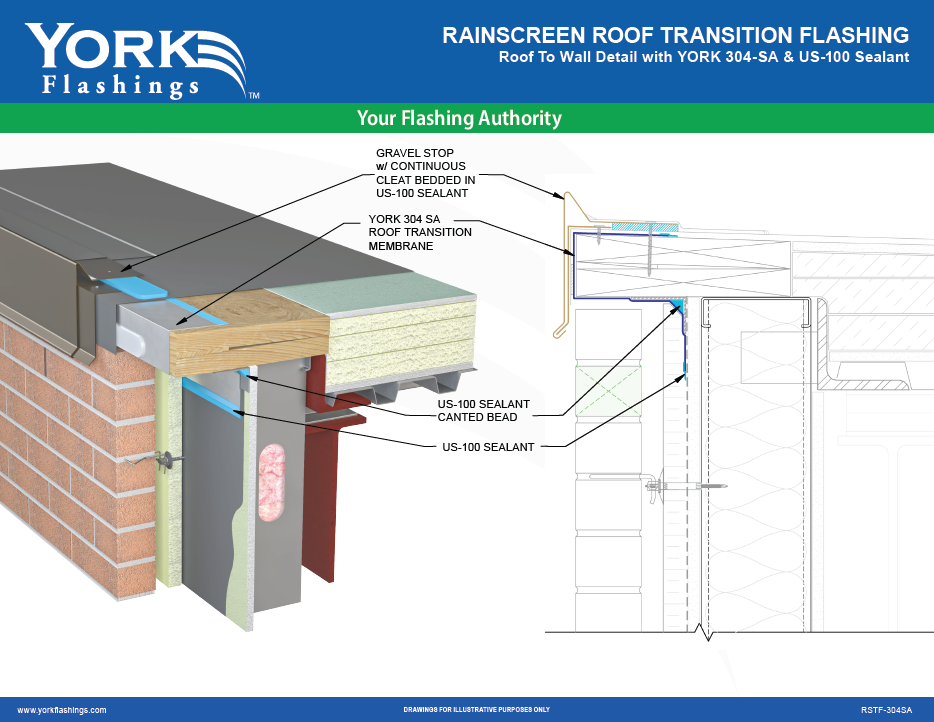
Rainscreen Roof Transition Flashing
Roof-to-Wall FAQs
Designing the Transition
A roof-to-wall transition must connect the air, water, thermal, and vapor control layers so the roof and wall function as one continuous building enclosure system. Because these transitions are common points for air leakage, moisture intrusion, and energy loss, they should be clearly designed before construction and verified in the field before being concealed.
Best Practices:
- Identify the primary roof air barrier during design.
- Use a dedicated transition flashing or membrane.
- Verify compatibility between roofing and wall systems.
- Avoid relying on sealants alone.
- Maintain continuity of all enclosure control layers.
Technical Rule:
If you cannot draw a continuous line from the wall air barrier to the roof air barrier, the transition design is incomplete.
Responsibility and Compliance
The roof-to-wall transition should be treated as one unified enclosure detail, with a single contractor clearly responsible for installation, coordination, and warranty. Establishing ownership, sequencing, material compatibility, and inspection requirements before construction helps prevent gaps between trades, enclosure failures, and warranty disputes.
Best Practices:
- Assign responsibility in specifications.
- Show complete transition details in one location.
- Conduct pre-construction and pre-installation coordination meetings.
- Inspect transitions before concealment.
- Require sign-off by all affected trades.
Technical Rule:
When everyone owns the transition, no one owns the transition.
Constructing the Detail
Most roofing manufacturers and industry guidelines recommend flashing extend at least 8 inches above the finished roof surface or anticipated water line to help protect against water, snow, and ponding. However, project-specific conditions and future reroofing needs may require greater heights, so designers should consider both current performance and long-term maintenance.
Best Practices:
- Start with 8-inch minimum.
- Consider future reroofing requirements.
- Increase flashing height where conditions warrant.
- Follow roofing manufacturer requirements.
- Maintain sufficient height above anticipated water levels.
Technical Rule:
Design flashing heights for the building’s worst day, not its average day.
Long-Term Performance
Most roof-to-wall air leakage failures occur because the roof and wall systems are not properly connected at the transition, even when each system performs well independently. Missing or incompatible materials, unsealed openings, movement, and unclear trade responsibility can create small gaps that lead to air leakage, condensation, energy loss, and long-term moisture damage.
Best Practices:
- Establish one continuous air barrier path.
- Verify compatibility between connected materials.
- Seal roof deck flutes and penetrations.
- Clearly assign transition responsibility.
- Inspect transitions before concealment.
Technical Rule:
Most air leaks are caused by missing connections, not defective products.